Pop Art Project
Overview
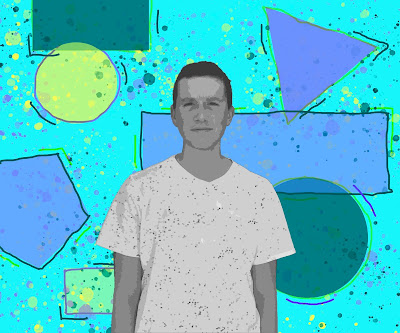
Our most recent project in eComm was to take pictures of our partner and turn it into pop art. We used photoshop to do so. We were to mainly focus on using adjustment layers, filters, blending
modes, brush tools and masks.
modes, brush tools and masks.
The Process
Before we started we looked at other pop artists, and I was really inspired by Warhols art and techniques. I started the process of turning the picture into pop art by turning it black and white using the black and white adjustment layer. Then I used the magic wand tool to select him and made him a new layer. I painted the background a light blue teal color, and decided I wanted to use pastels as the color scheme. I made multiple shapes in the background for variety, and kept them roughly 50% opacity. Then, I decided I wanted to outline them with colors opposite of the shape. After that, I thought it still looked to plain. So, I added some splatters using the same colors. Then I added a photoshop filter to the top layer, Caden. The last thing I did was adjust the blending mode on the whole background. I was messing around with the different modes and found one that I liked more that the original.


Comments
Post a Comment