Posts

Showing posts from October, 2018

Printing Processes

Image
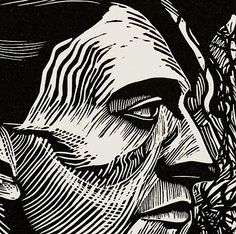
Relief Process Relief printing is the process of cutting or etching a surface so that the leftover surface is what is printed. You can use a barren with your hand, usually done with very thin paper. The printing is done on a plywood block. The grain will change how black the black areas appear. 1) Tone your wood block with a jet black wash 2) Use an aid to transfer the drawing 3) Decide on where you want white or black line imagery 4) Roll ink onto the block 5) Place the block on the press 6) Pass it through transferring the ink to paper Intaglio Process A printing process where the image area is below a flat surface of your printing plate. There are several options including dry point and etching. Dry point moves the metal and creates a burr where the ink is held. Etching involves a much longer process of preparation of the plate to create a trough the ink will sit in.  1) Prepare the plate for printing 2) Wipe the plate with ink 3) Remove excess i

How to Report Bullying Video

Image
Overview In eComm video, we had an assignment to make a 30 second video informing how to do something. I was the director of my group. We chose to do our video on how to report bullying. The bullies include Drew Sappingfield, John Wallace, and DJ Nixon. The target is Roman Clark. I was behind the camera. The bystander is Olivia Garza. I enjoyed working with my group, and everyone contributed.  We began the process by creating a storyboard. After that we did some location scouting. We found some areas we thought would work well. After a couple days of preparation, we got to film. I am not happy with the way the lighting looks because they turn the lights of in the hallway during class time. I think we should have filmed somewhere else, but no one else in my group has a locker. It looks okay, but it would be a lot nicer if the lighting was better. We took two days to film, and then it was into editing. It was a little difficult to cut the time to 30 seconds, but it was manag

Panorama Project

Image
The Meaning For eComm graphic design, I made a panorama. My theme is nature. I chose this theme because I love being outdoors and photography of nature. I took all of these pictures. Some were taken in my neighborhood, some in Iowa when I visited my grandparents, and some just around town. I love the outdoors because of all the life, and how everything is peaceful and beautiful. There are stories behind each of the pictures I used. For example, the picture of the bridge was taken at Ernie Miller Nature Park. While we were there taking pictures, my dads car got broken into in the parking lot. My sisters lanyard with her ID, money, and keys was luckily the only thing that was stolen. The picture of the sunflower was taken at the sunflower field when I went with my family. I was super hot that day. During the summer, I would frequently drive around with my dad, jamming to music and looking for good areas to take pictures. We would go to parks, fields, lakes, trails, anything. My

Pop Art Project

Image
Overview Our most recent project in eComm was to take pictures of our partner and turn it into pop art. We used photoshop to do so. We were to mainly focus on using adjustment layers, filters, blending modes, brush tools and masks. The Process Before we started we looked at other pop artists, and I was really inspired by Warhols art and techniques. I started the process of turning the picture into pop art by turning it black and white using the black and white adjustment layer. Then I used the magic wand tool to select him and made him a new layer. I painted the background a light blue teal color, and decided I wanted to use pastels as the color scheme. I made multiple shapes in the background for variety, and kept them roughly 50% opacity. Then, I decided I wanted to outline them with colors opposite of the shape. After that, I thought it still looked to plain. So, I added some splatters using the same colors. Then I added a photoshop filter to the top layer, Caden. The las